pip is the standard package manager for Python, allowing installation and management of third-party libraries and dependencies.
pip tool might not be included or readily accessible, necessitating manual installation. This guide details several common methods for installing pip on macOS environments. Understanding the Need for pip Installation
Python’s utility is significantly enhanced by its vast ecosystem of external packages available through the Python Package Index (PyPI). pip serves as the crucial link, enabling developers to easily download, install, and manage these packages. Installation issues can arise due to various factors, including:
- Older macOS versions not bundling
pipwith the system Python. - Managing multiple Python installations (e.g., system Python vs. installations via Homebrew or MacPorts), leading to uncertainty about which Python environment
pipbelongs to. - Permissions issues when attempting to install packages globally into the system Python directories.
Ensuring a correctly installed and accessible pip is fundamental for Python development workflows on macOS.
Important Note on Python 2:
Python 2 reached its official end-of-life on January 1, 2020. It no longer receives security updates or bug fixes. Using Python 2 and its associated tools (like pip for Python 2) for new development is strongly discouraged due to security risks.
This guide includes methods for installing pip for Python 2 primarily for legacy system maintenance where absolutely necessary. Prioritize migrating to Python 3 whenever possible.
Methods for Installing pip
pip. The suitability of each method may depend on the specific macOS version, existing Python setup, and user preferences regarding system modifications.
Method 1: Using the `get-pip.py` Script (Recommended)
This method is frequently recommended, utilizing an official bootstrap script provided by the Python Packaging Authority (PyPA).
- Download the script using
curl. For modern Python 3 versions:curl https://bootstrap.pypa.io/get-pip.py -o get-pip.pyAlternatively, for targeting the legacy system Python 2.7 specifically:
curl https://bootstrap.pypa.io/pip/2.7/get-pip.py -o get-pip.py - Execute the script using the appropriate Python interpreter. Running with
sudois often necessary for a system-wide installation:sudo python get-pip.pyOr, if targeting Python 3 specifically:
sudo python3 get-pip.py
A common one-line alternative combines download and execution:
# For Python 3
curl https://bootstrap.pypa.io/get-pip.py | sudo python3

# For Python 2.7 (if needed)
curl https://bootstrap.pypa.io/pip/2.7/get-pip.py | sudo python
Note: If permission errors occur (like `[Errno 13] Permission denied`), using sudo as shown is typically required. Network or SSL errors during the `curl` download step might indicate connectivity issues or outdated SSL libraries.
To install without sudo into a local directory (e.g., /usr/local, requiring appropriate permissions on that folder), use the --prefix option:
python get-pip.py --prefix=/usr/local/Method 2: Using `ensurepip` (Built-in Module)
Python versions (since 3.3, also backported) include a module called ensurepip designed to bootstrap pip into an installation.
To use it for the default Python installation, run:
sudo -H python -m ensurepip --upgradeReplace python with python3 if targeting Python 3 specifically.
Note: The sudo -H flag is recommended when running with sudo to ensure correct handling of the user’s home directory environment and cache ownership.
This method is useful for targeting specific Python installations by providing the full path to the desired Python executable:
sudo -H /path/to/specific/python -m ensurepip --upgradeRead: How to Fix `dyld: Library not loaded: icu4c` Errors on macOS After Homebrew Operations
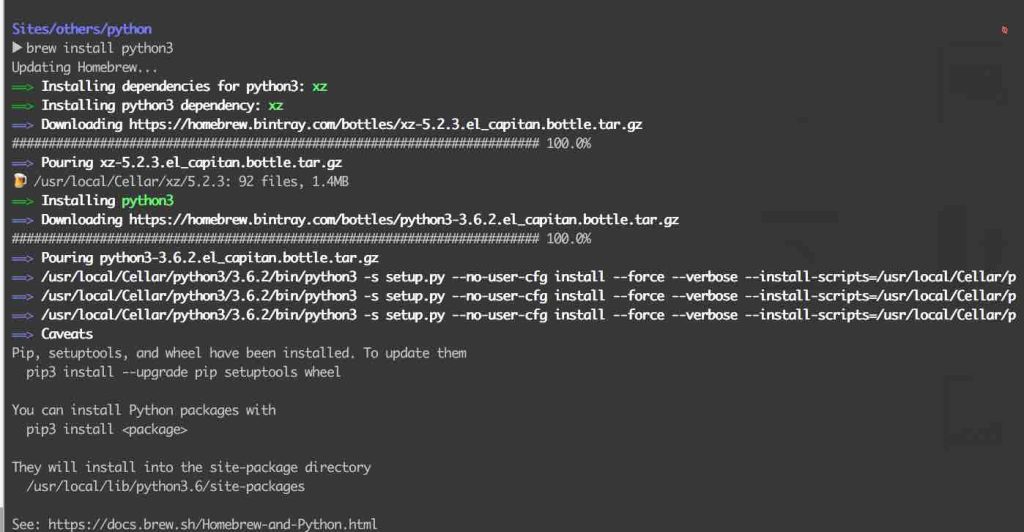
Method 3: Using Homebrew (Package Manager)
Homebrew is a popular package manager for macOS. Installing Python via Homebrew typically includes pip.
- Install Homebrew if you haven’t already (visit the official Homebrew website for instructions).
- Update Homebrew and install Python:
brew update
brew install python
This command usually installs the latest Python 3. For Python 2, use `brew install python@2` (though Python 2 is deprecated).
Why this works: Homebrew manages a separate Python installation in its own directory (often /usr/local/Cellar or /opt/homebrew/Cellar), avoiding modification of the macOS system Python. This installation includes `pip` (usually as `pip3`).
To take into account:
- Ensure the Homebrew binary directory is in your shell’s PATH. Note: The path differs by architecture: /usr/local/bin is typical for Intel Macs, while /opt/homebrew/bin is standard for Apple Silicon Macs.
- The pip command associated with Homebrew’s Python 3 is typically named pip3.
- On newer macOS versions or Apple Silicon, Python executables and scripts might reside in a path like /opt/homebrew/opt/python@3.x/libexec/bin relative to the Homebrew prefix. Adding this directory to your PATH might be required if pip3 is not found directly in the main bin folder.
Considerations:
- Ensure the Homebrew binary directory (e.g.,
/usr/local/binor/opt/homebrew/bin) is in your shell’s `PATH`. - The `pip` command associated with Homebrew’s Python 3 is typically named `pip3`.
You might need to use `pip3` explicitly or create a shell alias like `alias pip=pip3` in your `~/.zshrc` or `~/.bash_profile`. - Sometimes, linking issues occur. Commands like `brew unlink python && brew link python` or `brew postinstall python3` might be necessary.
- On newer macOS versions or Apple Silicon, Python executables and scripts might reside in a path like `/opt/homebrew/opt/python@3.x/libexec/bin`. Adding this directory to your `PATH` might be required if `pip3` is not found.
Method 4: Using `easy_install` (Legacy Method)
easy_install is an older package management tool that often comes with system Python on macOS. While largely superseded by `pip` and sometimes deprecated, it can be used to install `pip`.
sudo easy_install pip`easy_install` fetches and installs packages, including `pip` itself.
Considerations:
- This method is considered legacy and may be deprecated or removed in future macOS versions.
- It might fail with errors like “[SSL: TLSV1_ALERT_PROTOCOL_VERSION]” or “Could not find suitable distribution” due to outdated protocols or package index issues.
- If Homebrew Python is installed and takes precedence in your `PATH`, you might need to specify the system `easy_install` path to target the system Python:
sudo /usr/bin/easy_install pipMethod 5: Using MacPorts (Alternative Package Manager)
MacPorts is another package manager for macOS. If using MacPorts for Python installations, you can install `pip` through it.
For example, to install `pip` for Python 2.7 managed by MacPorts:
sudo port install py27-pipSimilar to Homebrew, MacPorts manages its own set of packages and dependencies.
Note: Ensure the MacPorts binary directory (e.g., `/opt/local/Library/Frameworks/Python.framework/Versions/2.7/bin`) is added to your shell’s `PATH`.
Method 6: Emerging Tool – `uv`
A newer tool, `uv`, developed in Rust, aims to provide a faster, unified experience replacing tools like `pip`, `pipx`, `venv`, etc. While adoption is growing, it represents a modern alternative.
Installation:
curl -LsSf https://astral.sh/uv/install.sh | shExample Usage:
# Install a specific Python version
uv python install 3.12

# Create a virtual environment using that Python
uv venv --python 3.12

# Activate and use (uv implicitly manages activation in many commands)
# Install packages (example)
uv pip install requests
Verifying the Installation
After attempting installation using one of the methods above, verify that pip is accessible and working correctly.
Check the installed version:
pip --versionOr, if you installed/expect `pip3`:
pip3 --versionThis command should output the installed `pip` version and the associated Python version and location.
You can also attempt to list installed packages (which will likely be few initially):
pip listOr:
pip3 listImportant Considerations
- `sudo` Usage: Installing
pipglobally often requiressudo(root privileges). This modifies system directories and can lead to permission issues later or potential system instability if not done carefully. Using package managers like Homebrew or installing within virtual environments avoids modifying the system Python. If using `sudo`, the `-H` flag (`sudo -H`) is often recommended for Python commands to handle environment variables correctly. - System Python vs. Managed Python: Check which Python installation you are targeting. Modifying the system-provided Python can sometimes interfere with OS operations. Using Homebrew or MacPorts isolates development environments but requires managing `PATH` settings correctly.

- `pip` vs. `pip3`: With Python 3 installations, especially via Homebrew, the command is frequently `pip3`. Use this explicitly or set up a shell alias (`alias pip=pip3`) in your `~/.zshrc` (for Zsh, default on newer macOS) or `~/.bash_profile` (for Bash) for convenience.
- `PATH` Environment Variable: The directory containing the `pip` executable must be in your shell’s `PATH`. If `pip` or `pip3` commands are not found after installation, verify your `PATH` configuration.
- Deprecation: `easy_install` is considered deprecated. Python 2 reached its end-of-life in 2020; using Python 3 is strongly recommended for ongoing development.
- Virtual Environments: For project-specific dependencies, using virtual environments (e.g., via `python3 -m venv myenv`, `source myenv/bin/activate`) is best practice. This isolates project dependencies and avoids conflicts, often circumventing the need for global `pip` installations with `sudo`.
Conclusion
Installing pip on macOS can be achieved through various methods, ranging from utilizing the official `get-pip.py` script or the built-in `ensurepip` module to leveraging package managers like Homebrew or MacPorts. Understanding the distinction between the system Python and other installations, managing the `PATH` variable, and being aware of the implications of using `sudo` are key to a successful setup. Once installed, pip provides essential functionality for managing packages within the Python ecosystem.


