The Python Package Installer, commonly known as `pip`, is an essential tool for managing software packages written in Python. It allows developers to easily install, upgrade, and remove Python libraries and dependencies.
While historically requiring separate installation steps, its integration has significantly improved with recent Python versions. This guide outlines various methods for ensuring `pip` is available and functional on Windows operating systems, based on common practices and Python version specifics.
Understanding pip Installation on Windows
Historically, installing `pip` on Windows involved manual steps, often relying on its predecessor, `easy_install`, and carefully configuring system environment variables. This presented challenges, especially for those new to Python development. However, the Python ecosystem has evolved.

A significant advancement occurred with Python 3.4 (March 2014) and Python 2.7.9 (December 2014). These versions, and all subsequent releases, include `pip` by default, simplifying the setup process considerably. For systems running these newer versions, `pip` should typically be available out-of-the-box.
For older Python installations or situations where `pip` might be missing, several reliable methods exist to install or ensure its presence.
Version updates: Python 2.7 is no longer supported (end-of-life as of January 2020)
Read: Update npm on Windows: Your Comprehensive Troubleshooting Guide
Installation and Verification Methods

Read: Update npm on Windows: Your Comprehensive Troubleshooting Guide
Method 1: Leveraging Built-in `pip` (Python 3.4+ and 2.7.9+)
For systems with Python 3.4+ or Python 2.7.9+ installed, `pip` is typically included. You can verify its installation by opening a command prompt and checking its version:
pip --versionOr, particularly when multiple Python versions are present, using the `python` launcher:
py -m pip --versionOr directly invoking the specific Python interpreter:
python -m pip --versionEnsuring `pip` is Available (`ensurepip`)
If `pip` appears to be missing despite having a compatible Python version, you can attempt to install it using the built-in `ensurepip` module. Execute the appropriate command in your command prompt:
For Python 3:
py -3 -m ensurepipOr more generally:
python -m ensurepipThis command bootstraps the `pip` installation into your current Python environment.
Read: How Fix the ‘Unable to find vcvarsall.bat’; Error During Python Package Installation on Windows
Method 2: Using the Official `get-pip.py` Script
For older Python versions (before 3.4 or 2.7.9) or if `ensurepip` fails, the recommended approach is using the official `get-pip.py` bootstrapping script.
- Securely download the script from https://bootstrap.pypa.io/get-pip.py. Ensure it is saved with a `.py` extension.
- Open a command prompt, potentially with administrator privileges (Right-click Command Prompt icon -> “Run as administrator”).
- Navigate to the directory where you saved `get-pip.py`.
- Execute the script using Python:
python get-pip.py
This script will install `pip` and its necessary dependency, `setuptools`, if it’s not already present. Administrator access might be required for system-wide installation.
Alternatively, a one-line command using Python’s built-in capabilities can download and execute the script (use with awareness of executing remote code):
python -c "exec('try: from urllib2 import urlopen \nexcept: from urllib.request import urlopen');f=urlopen('https://bootstrap.pypa.io/get-pip.py').read();exec(f)"Or using `curl` if available (e.g., via Git Bash or manual installation):
curl https://bootstrap.pypa.io/get-pip.py -o get-pip.py
python get-pip.py
Method 3: Utilizing Virtual Environments (`venv` / `virtualenv`)
Using virtual environments is a best practice in Python development to isolate project dependencies. Both the built-in `venv` module (Python 3.3+) and the external `virtualenv` package automatically install `pip` into each new environment.
Using `venv` (Python 3.3+)
- Create a new virtual environment:
python -m venv myprojectenv - Activate the environment:
.\myprojectenv\Scripts\activate - Once activated (indicated by `(myprojectenv)` in the prompt), `pip` will be available within that environment.
Using `virtualenv` (External Package)
If you prefer or need `virtualenv` (which might require prior `pip` installation to install `virtualenv` itself):
- Install `virtualenv` (if needed, using one of the methods above to get `pip` first):
pip install virtualenv - Create a new virtual environment:
virtualenv myprojectenv - Activate it:
.\myprojectenv\Scripts\activate
An alternative approach involves downloading the `virtualenv` package manually, extracting `virtualenv.py`, placing it in your project folder, and running `python virtualenv.py myvirtualenv` to create the environment, which will include `pip`.
Method 4: Alternative Distributions and Package Managers
Several third-party distributions or package managers for Windows also streamline the process:
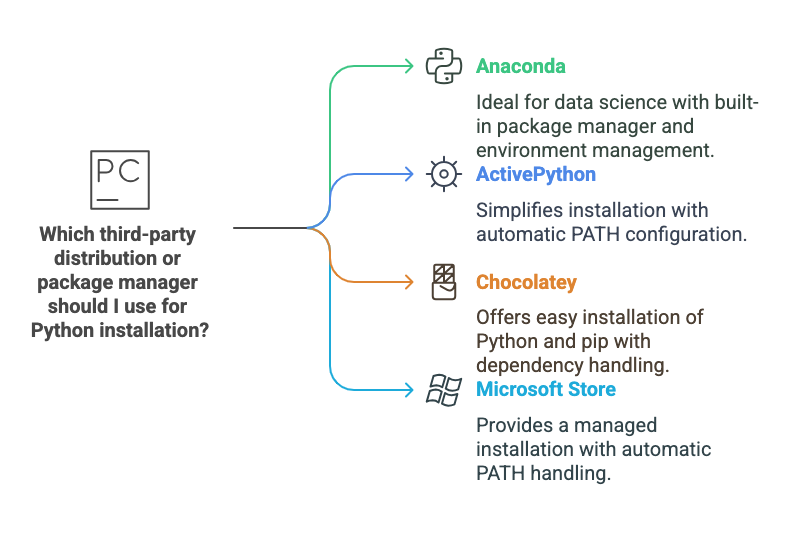
- Anaconda: A popular distribution for data science, Anaconda includes its own package manager (`conda`) but also bundles `pip`. It manages environments and non-Python dependencies effectively. Install packages using `conda install ` or `pip install `.
- ActivePython: This distribution includes the PyPM package manager and also bundles `pip`, often configuring the system PATH automatically during installation.
- Chocolatey: A package manager for Windows. Once Chocolatey is installed, you can install Python and `pip` via commands like:
choco install python
# For older setups, easy_install might have been needed first:
# choco install easy.install
choco install pip
Note: Installing `pip` via Chocolatey often handles the installation of `easy_install`/`setuptools` automatically as a dependency.
- Microsoft Store (Windows 10+): Installing Python directly from the Microsoft Store provides a managed installation that includes `pip` and typically handles PATH considerations automatically.
Method 5: Manual Installation via `setuptools` (Older Method)
This method, involving `easy_install`, is largely outdated due to the prevalence of `get-pip.py` and bundled `pip`, but might be encountered in legacy contexts.
- Download and install `setuptools` (which provides `easy_install`). This might involve downloading an `.exe` installer or running `ez_setup.py` from the official `setuptools` source (PyPI). Note that older installers sometimes had issues with 64-bit Windows.
- Ensure the Python `Scripts` directory (e.g., `C:\Python27\Scripts`) is in your system’s PATH environment variable.
- Open a command prompt (potentially as administrator) and run:
easy_install pip
Troubleshooting Common Issues
Configuring the System PATH
Problem: Commands like `python`, `pip`, or `easy_install` result in “‘…’ is not recognized as an internal or external command”.
Solution: The directories containing `python.exe` and `pip.exe` must be added to your system’s `PATH` environment variable. Typically, these are:

To edit the PATH: Search for “Edit environment variables for your account” in the Windows Start menu, select “Path” under User variables or System variables, click “Edit”, and add the necessary directories. Remember to open a *new* command prompt window for the changes to take effect.
Note: If you have multiple Python versions or other tools like Strawberry Perl installed, the order of directories in the PATH matters. Ensure the desired Python installation’s paths appear *before* others that might have conflicting command names (like `pip`).
Administrator Privileges
Problem: Installation fails with permission errors.
Solution: Many installation methods (especially those modifying system-wide Python installations, like `get-pip.py` or `easy_install`) require elevated privileges. Right-click the command prompt or PowerShell icon and select “Run as administrator”.
Proxy Configuration
Problem: `pip` fails to download packages due to network connection errors, often behind a corporate firewall.
Solution: Set the `http_proxy` and `https_proxy` environment variables. The syntax is generally:
http://proxy_url:port
http://username:password@proxy_url:port
Set these via the Environment Variables settings or temporarily in your command prompt session. For NTLM proxies, a local proxy tool like `Cntlm` might be necessary to bridge the connection.
Compiler Error: `Unable to find vcvarsall.bat`
Problem: `pip install ` fails with this error when trying to install a package containing C/C++ extensions.
Solution: This indicates that `pip` needs a C/C++ compiler but cannot find one configured correctly. Options include:
- Install a compatible C++ compiler. Microsoft provides specific Visual C++ compilers tailored for different Python versions (e.g., “Microsoft Visual C++ Compiler for Python 2.7”). A general installation of Visual Studio or MinGW can also work.
- Install pre-compiled binary versions (Wheels) of the package if available. `pip` usually prefers wheels automatically. Many complex packages are available as wheels on PyPI.
- Check Christoph Gohlke’s Unofficial Windows Binaries for Python Extension Packages page for pre-built installers or wheels, especially for scientific packages.
SSL/Certificate Verification Errors
Problem: `pip` fails with SSL or certificate verification errors when connecting to PyPI.
Solution: This can sometimes occur due to outdated components (Python, `pip`, `setuptools`, OpenSSL) or network interception (like some proxies). Ensure `pip` and `setuptools` are up-to-date:
python -m pip install --upgrade pip setuptoolsIn specific, trusted scenarios, you might temporarily bypass verification for a specific host (use with caution):
pip install --trusted-host pypi.python.org --trusted-host files.pythonhosted.org An older workaround involved using an older `pip` version (e.g., 1.2.1) that didn’t enforce SSL as strictly, but upgrading is generally preferred.
Executing `pip`
Problem: Typing `pip` doesn’t work, even if it seems installed.
Solution: Especially on Windows or with multiple Python versions, it’s often more reliable to invoke `pip` as a module:
python -m pip install Or using the Windows Python launcher `py`:
py -m pip install This ensures you are using the `pip` associated with that specific Python interpreter.
Verification After Installation
Once you believe `pip` is installed and the PATH is configured correctly, verify its operation:
- Check the installed version:
pip --versionor
python -m pip --version - Try installing a simple package:
pip install requests(Or `python -m pip install requests`)
- List installed packages:
pip list
Successful execution of these commands indicates a working `pip` installation.
Conclusion
Installing `pip` on Windows has become significantly more straightforward, primarily due to its inclusion in standard Python distributions since versions 3.4 and 2.7.9.
For most users, simply installing a recent version of Python is sufficient. When manual installation or troubleshooting is needed, the official `get-pip.py` script offers a reliable method.
Understanding PATH configuration, potential compiler requirements, and the benefits of virtual environments are key to effectively managing Python packages on Windows using `pip`.


